This project was done last year in 2014 summer, but I didn’t have time to update the blog until this year 2015. This is part one of our front yard project, check out DIY front yard (Part 2/2) – Walkway with Permacon Rosebel Slabs and landscaping if you are interested.
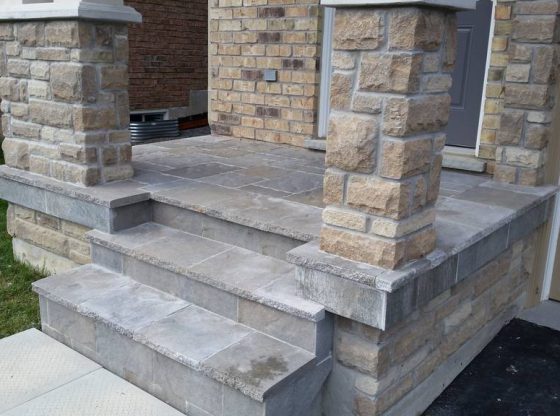
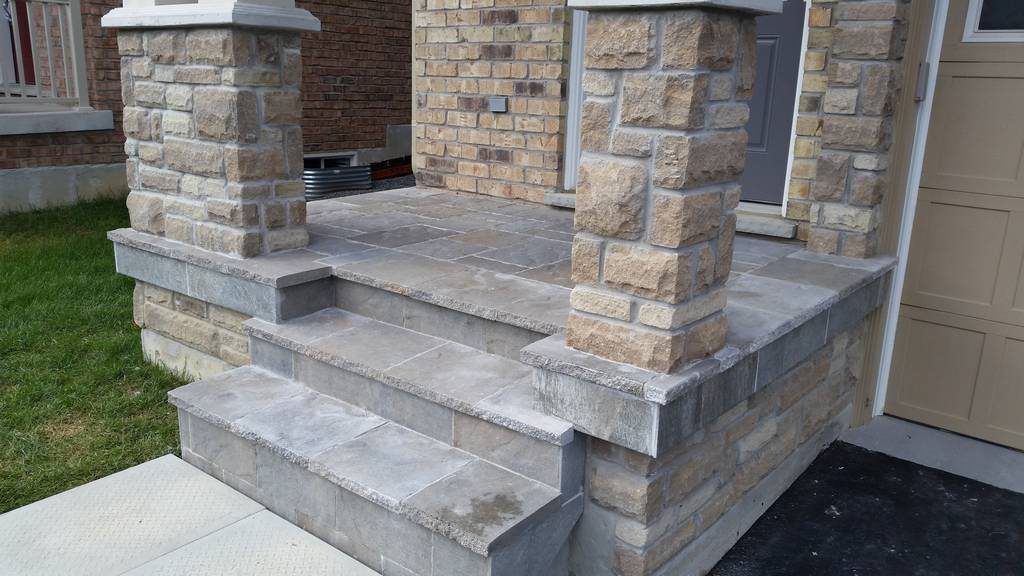
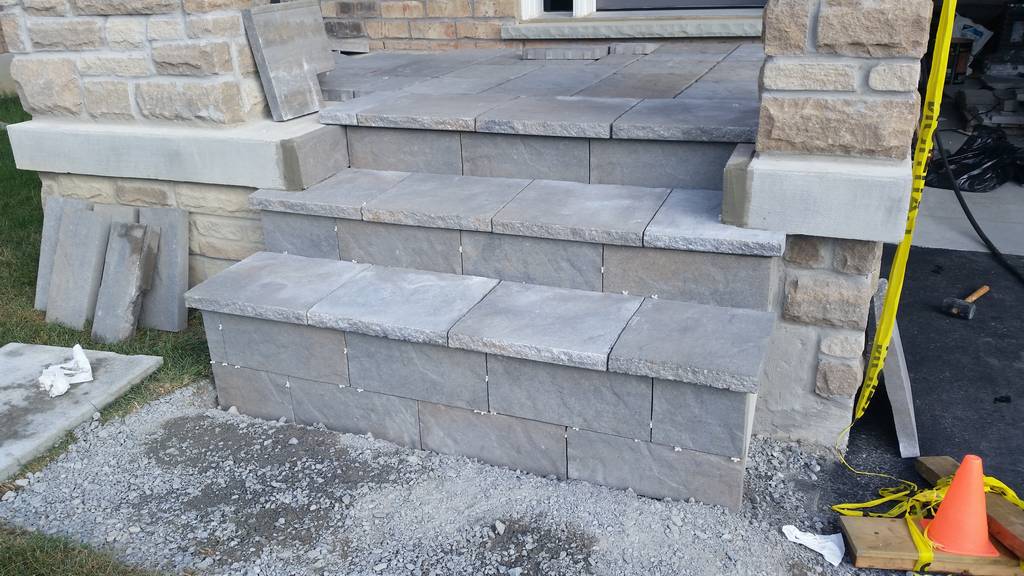
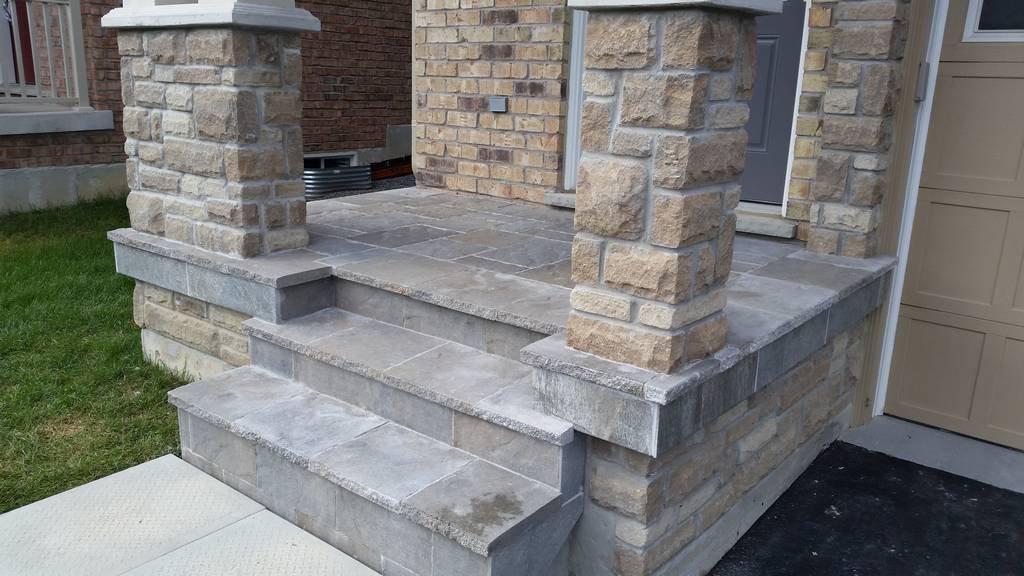
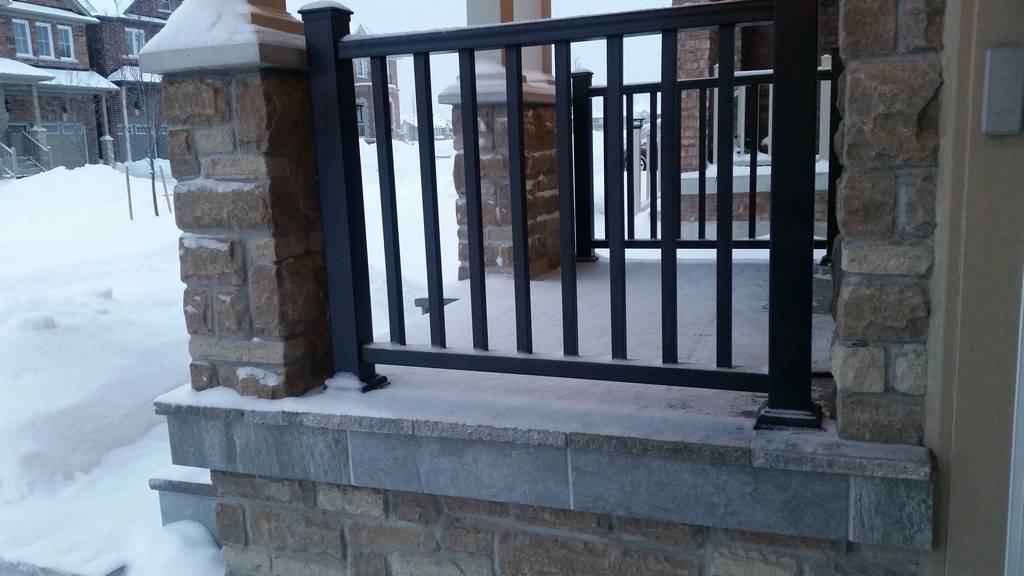
Techo Bloc Venetian was NOT my ideal choice to be honest, many professionals use natural stone slabs which have better looking hand-chiseled edges especially on the porch. But since this was a DIY project and I wanted to make the cutting as easy as possible. With the height of each slab at 45mm (1 3/4″) and they claim that this product is resistant to de-Icing salt, that’s why I chose Techo Bloc. The system has risers and caps and it works perfectly with Techo Bloc’s Blu 45 series (nice pattern).
Polymer Modified Mortar vs Regular Mortar
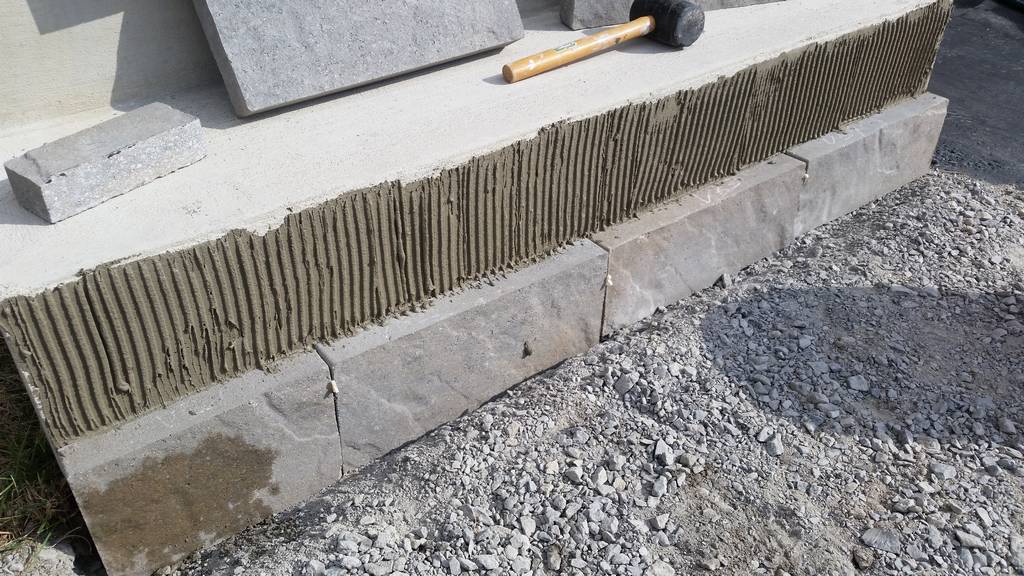
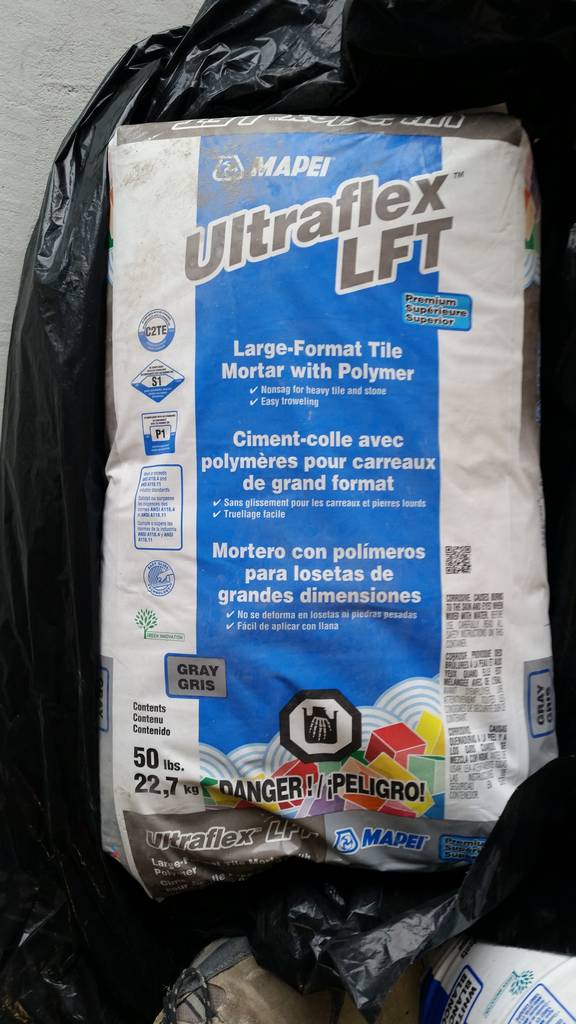
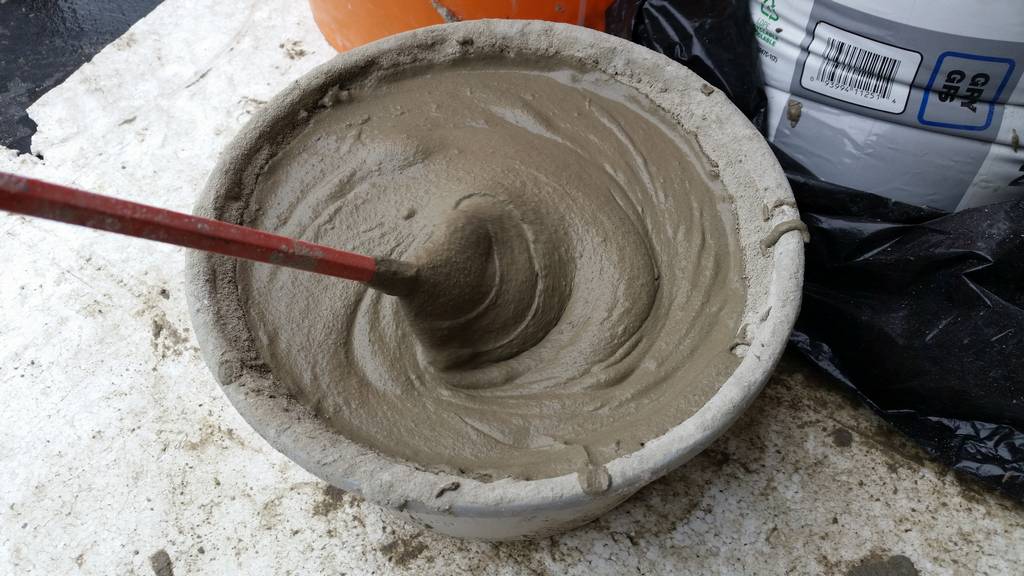
When I ordered the slabs, the guy at the stone company told me it is important to get “Polymer Modified Mortar”. The mortar can be used for both bonding to the concrete as well as being use as grout. At Lowes, there were many choices even with polymer modified, it was so confusing. I chose Mapei Ultraflex LFT and it worked pretty well.
Honestly speaking, I bet the regular mortar (in concrete section at hardware store) would work too since I have seen the professional in our neighborhood used those. But I trusted that guy, so I went with Mapei (in Tile section at Lowes). The cutting, mixing mortar, grouting are pretty common sense for serious DIY people, I am not going to talk about it in details.
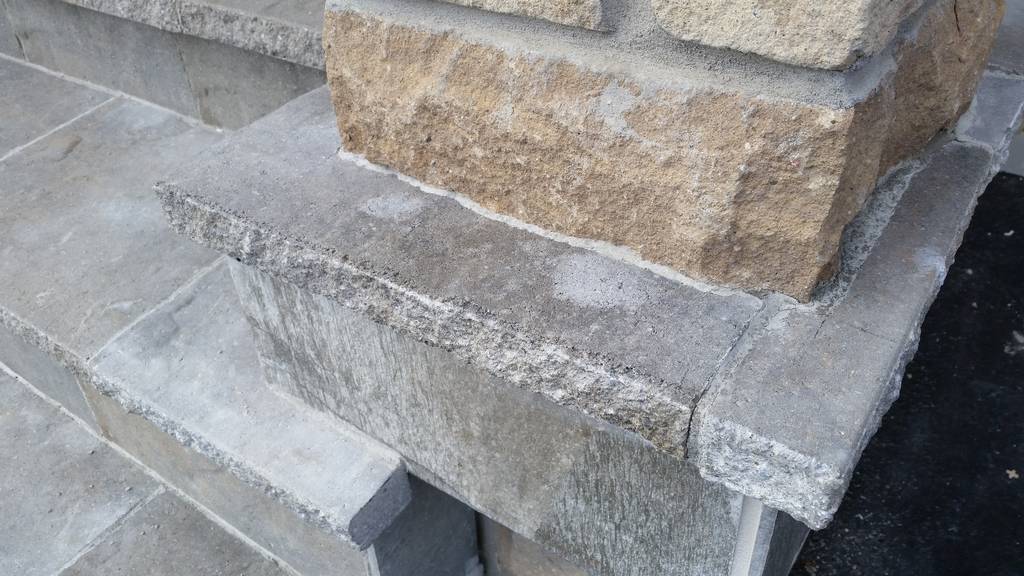
Grout has hairline cracks
When the polymer modified mortar dried, there were hairline cracks in the grout lines everywhere. I had to re-apply another thin layer of mortar, and it was fixed perfectly. I guess the mortar shrinkage is the natural process of strong bonding, but that wasn’t I expected on the grout. Watch out for hairline cracks, water may get in if you don’t fix them.
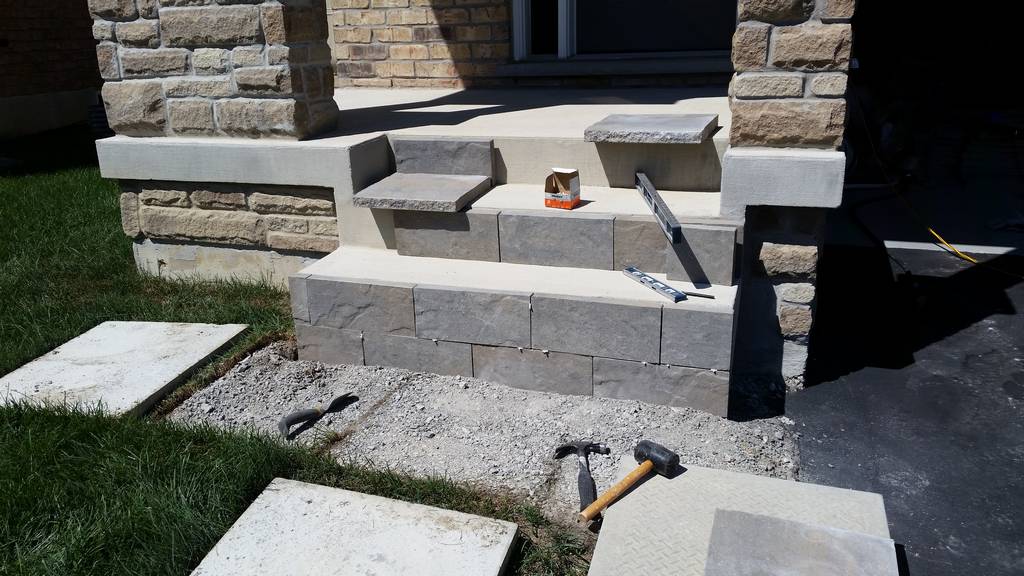
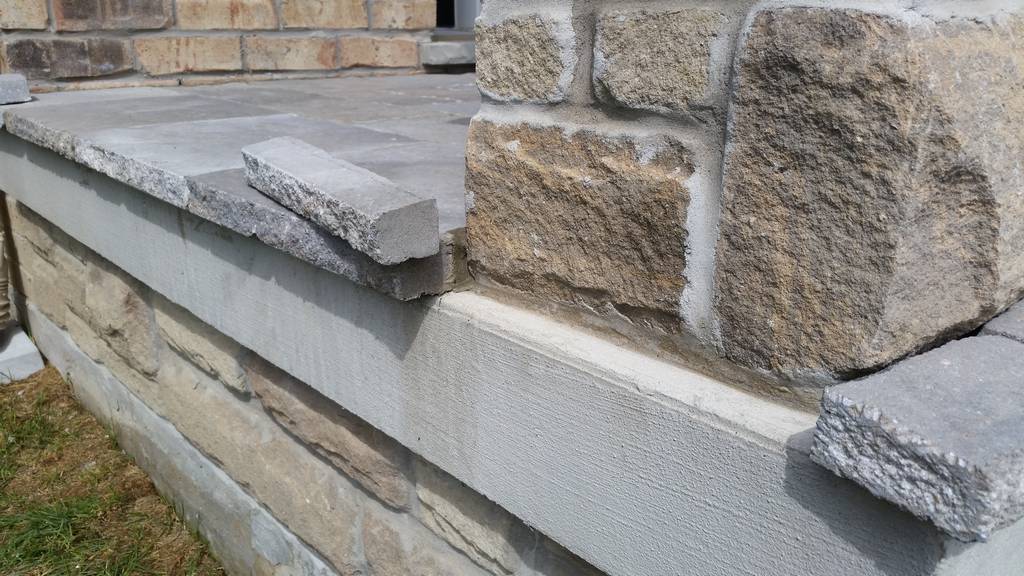
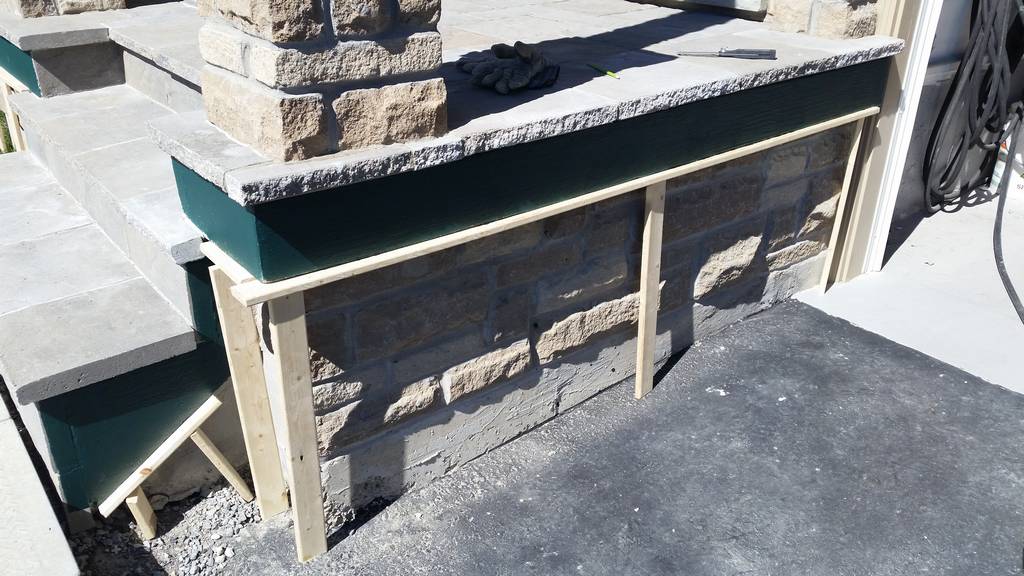
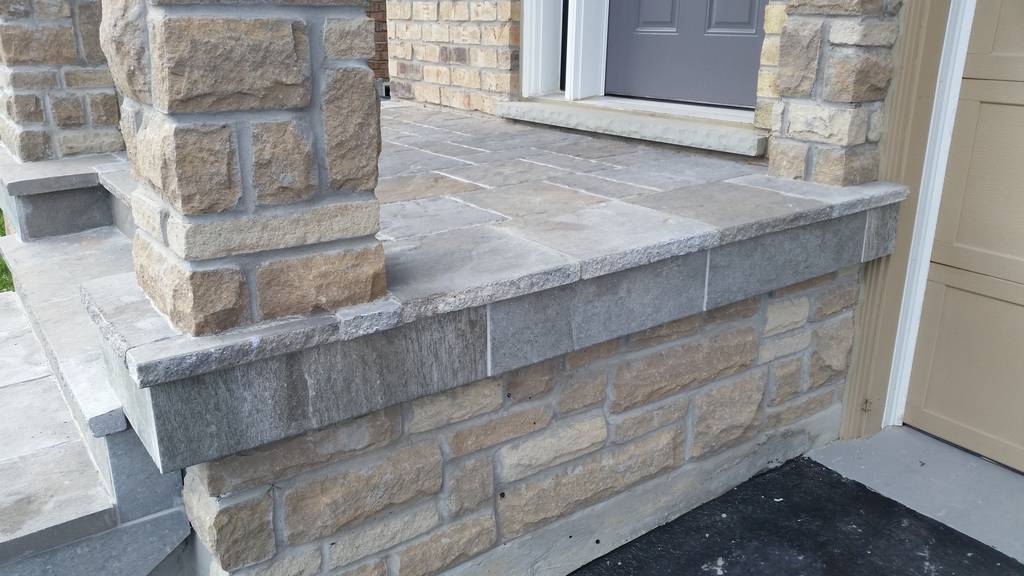
Riser was too heavy and too thick, switched to Tile
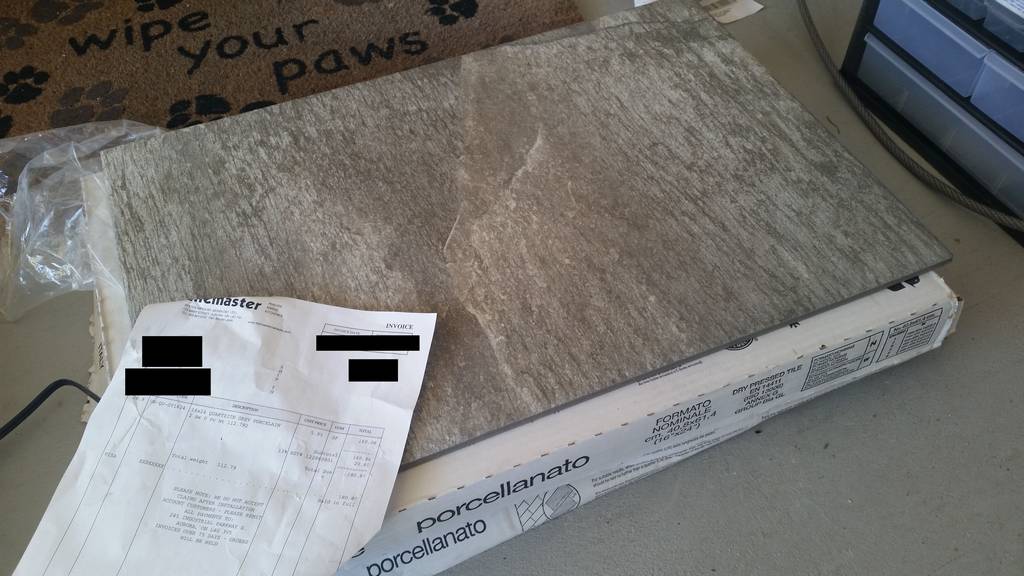
The Venetian system comes with risers and caps, the risers are perfect for the stairs. But when it comes to wrapping around the porch, they are WAY TOO HEAVY (15 lb each) and TOO THICK (1 3/4″). Absolutely FAIL. I had no choice and switched to outdoor grade Procelian Tiles. The color and pattern was close enough. After finishing the project, I have 20+ pieces of risers left. Arrgg… save it for other projects.
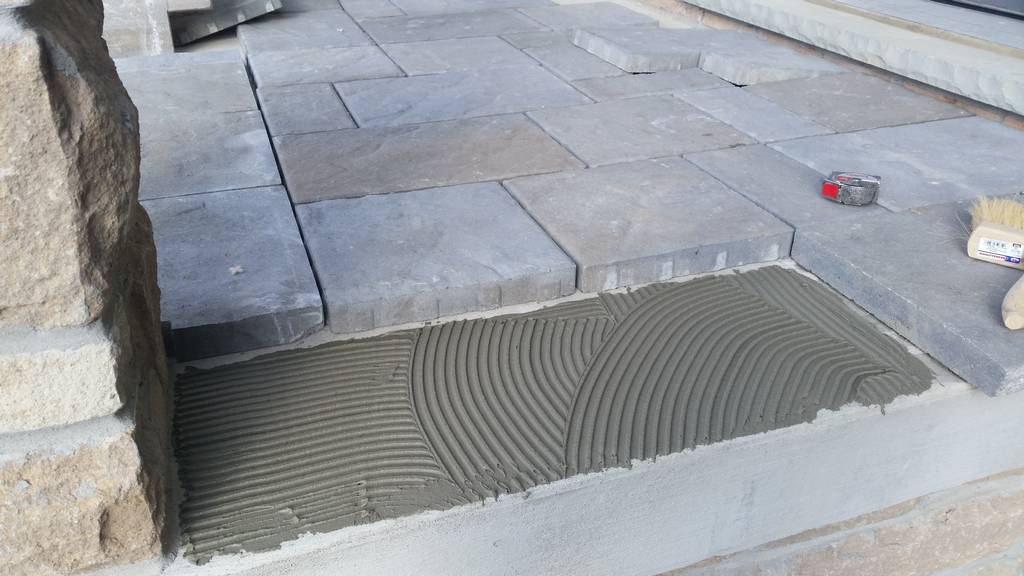
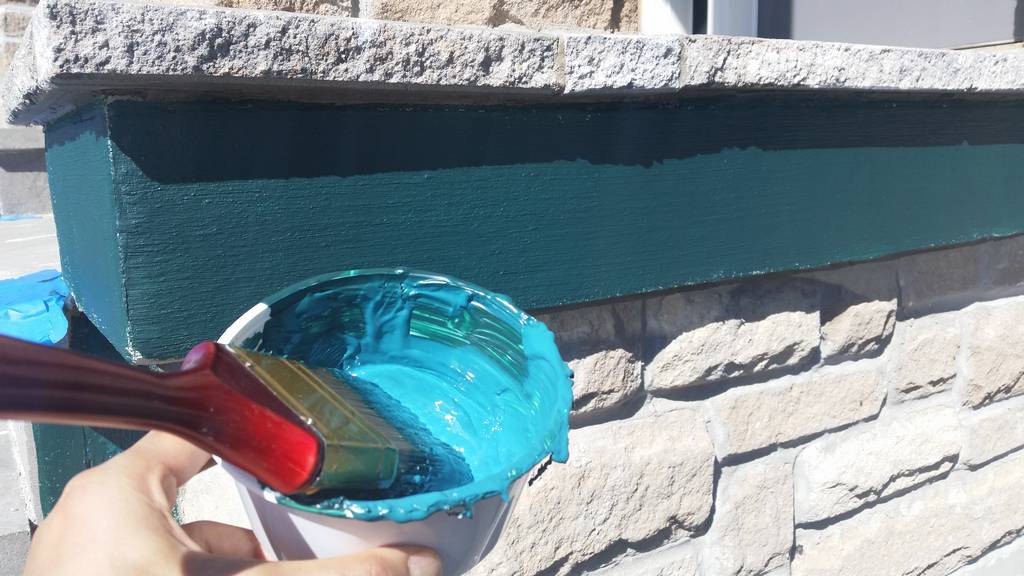
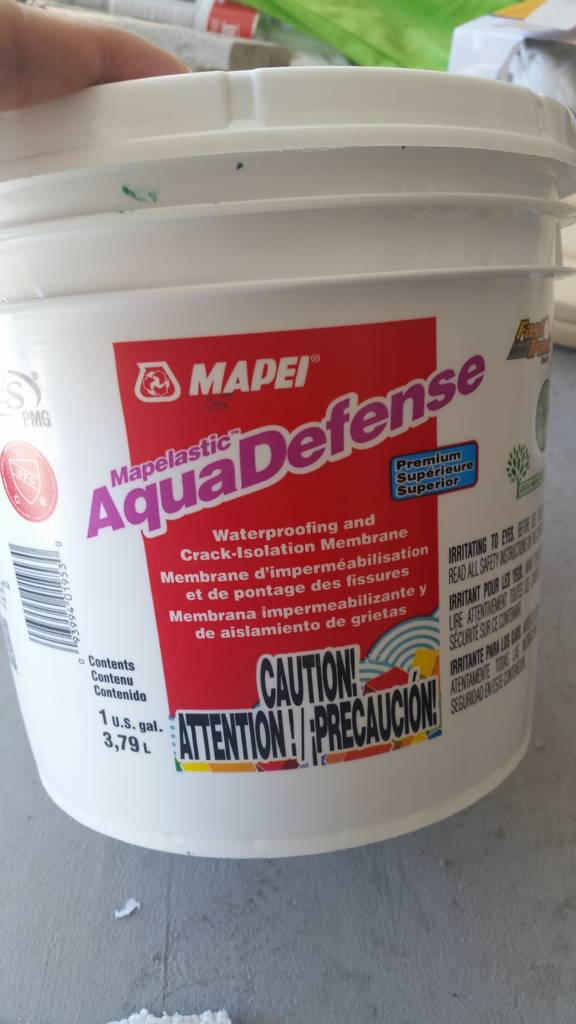
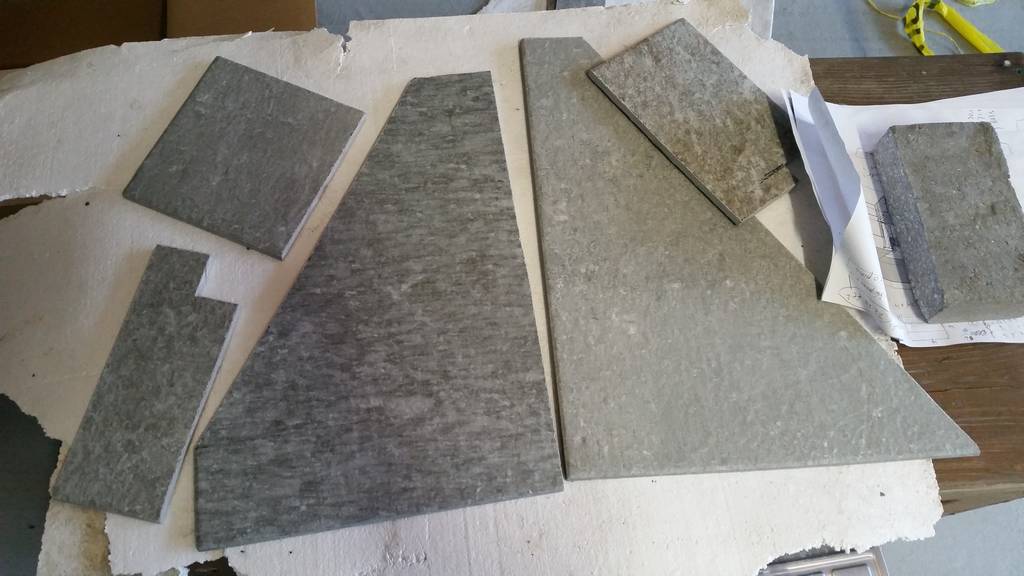
Tile Crack-Isolation Membrane
I could not afford to re-do this project, as I was doing some research on the Internet, people said on top of outdoor grade tiles, it is necessary to apply a layer of crack-isolation membrane since the installation was DIRECTLY onto the concrete.
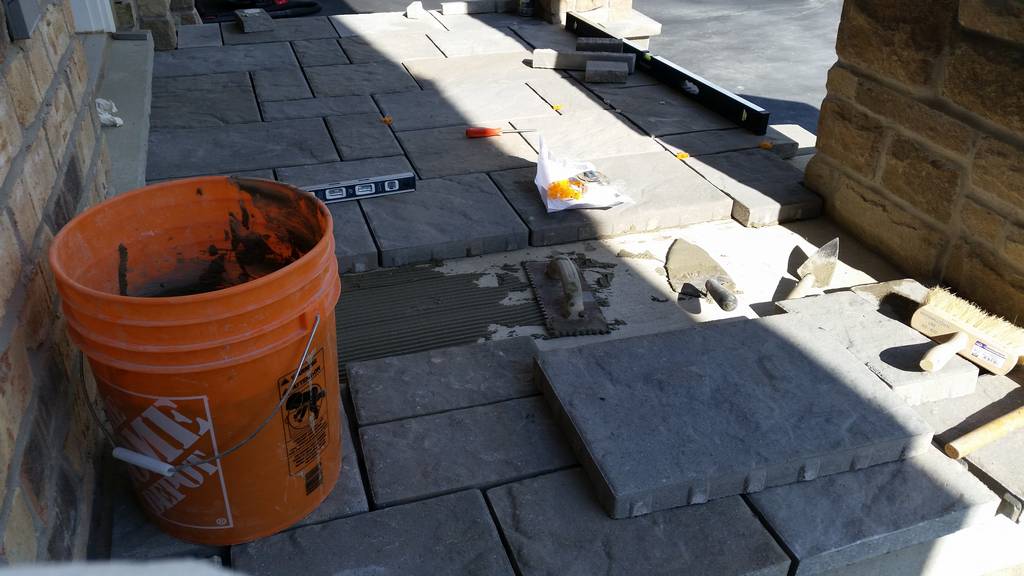
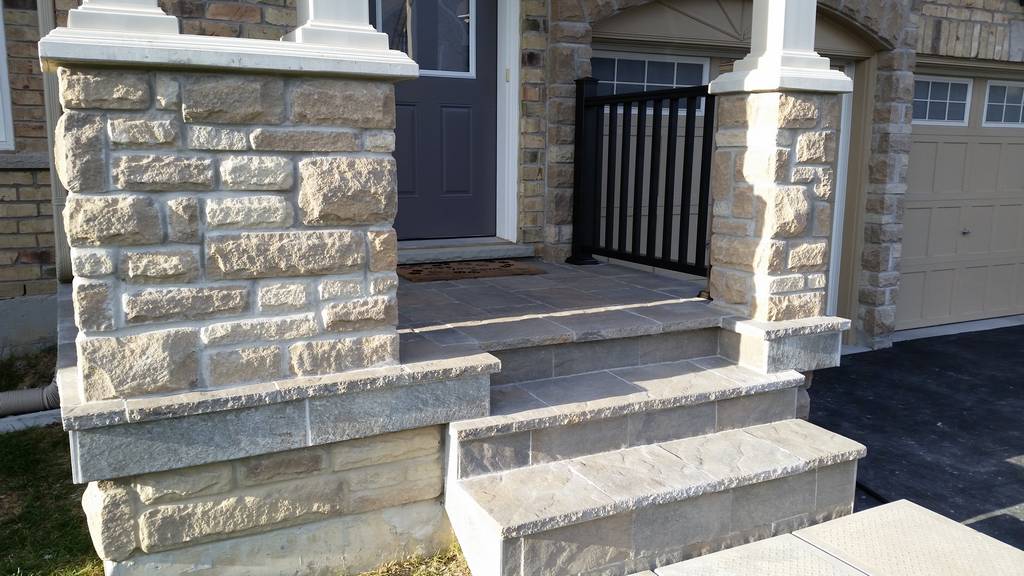
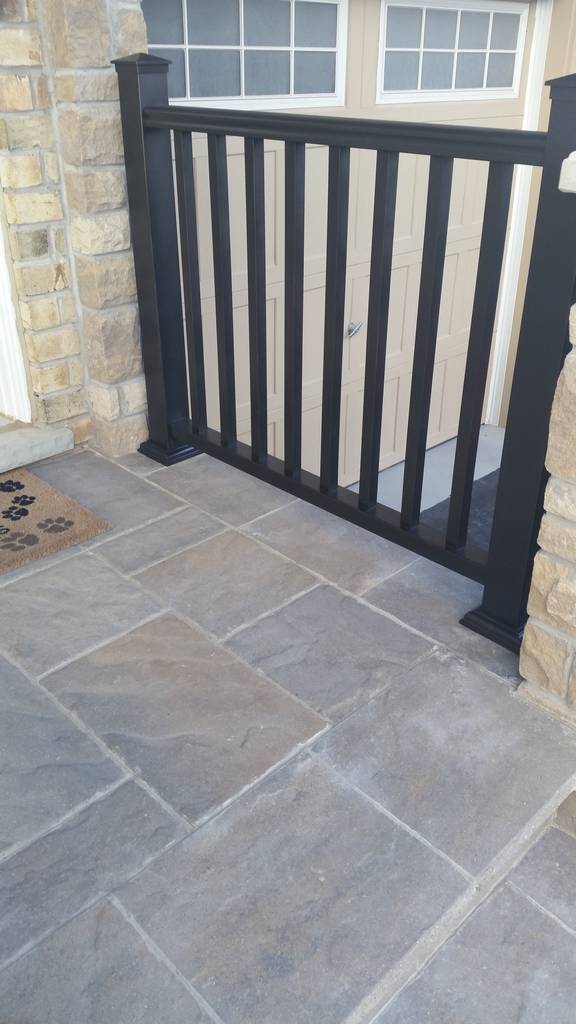
Installation Process
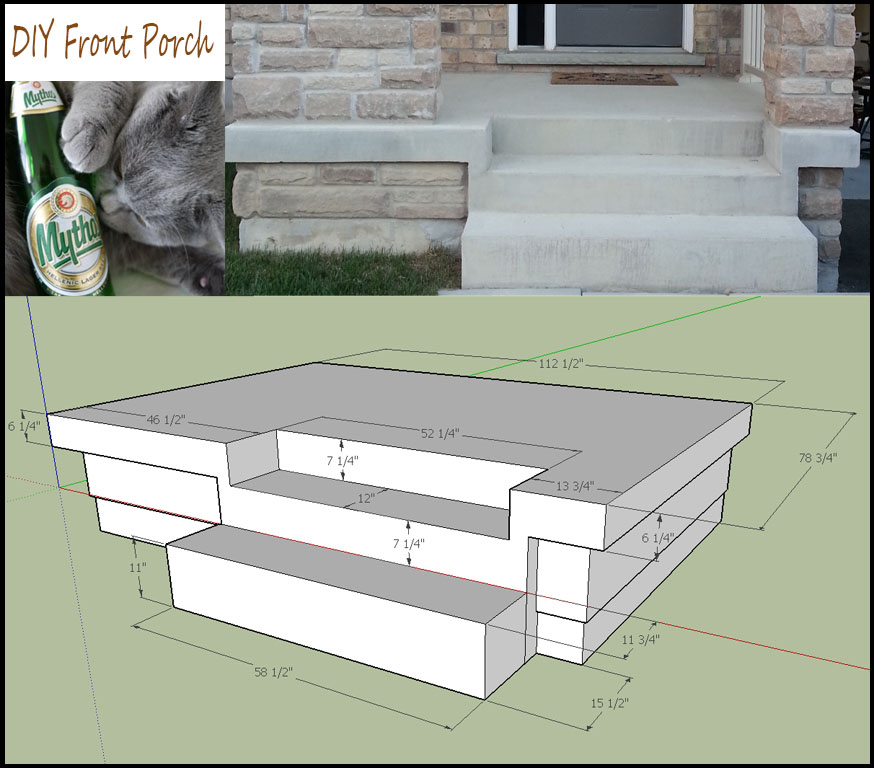
The process was straight forward and pretty self explanatory if you see the photos. The only thing you need to pay attention is to follow the original slope for water drainage. It took me more than a month to finish everything as I only work on weekends and some weekday after work. Tips: Rent a 14″ gas concrete saw to cut all the big slabs and leave the small one to your 7 1/4″ circular saw (diamond blade is a must) and 4 1/2″ angle grinder (abrasive blade is good) for detail grinding.


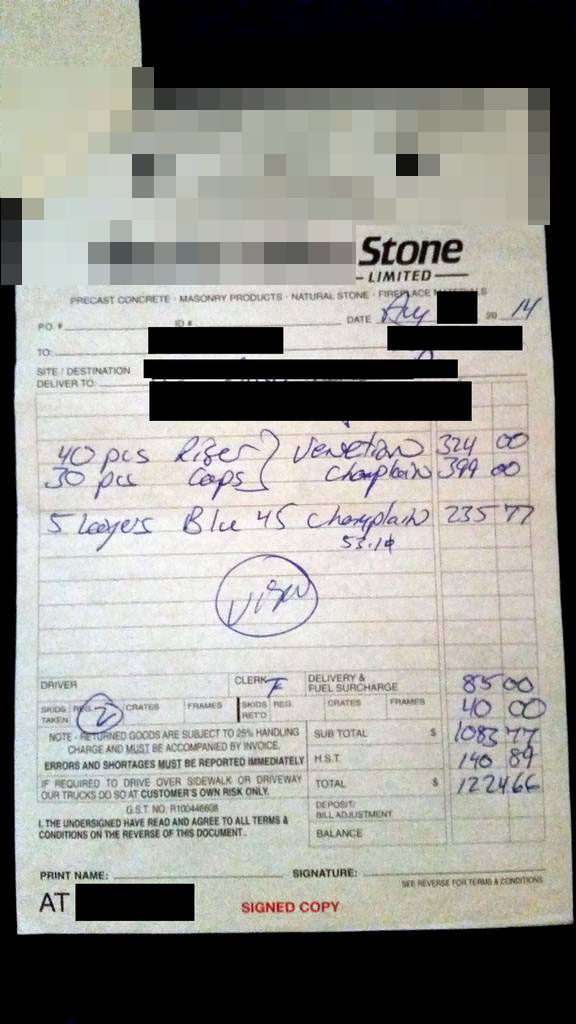
There is cost breakdown of subtotal around $1700 CAD
- Techo Bloc pavers (see invoice for details) $ 1225 CAD
- LePage PL600 Landscape block adhesive x 2 = $12 CAD
- Mapei Ultraflex LFT Large-Format Tile Mortar with Polymer (50 lbs) x 2 = $50 CAD
- Mapei AquaDefense 1 gal $90 CAD
- 16×24 Quartzite Grey Porcelian (2 boxes) $180 CAD
- Mapei sanded grout 5 lb $10 CAD
- Mapei grout additive $30 CAD
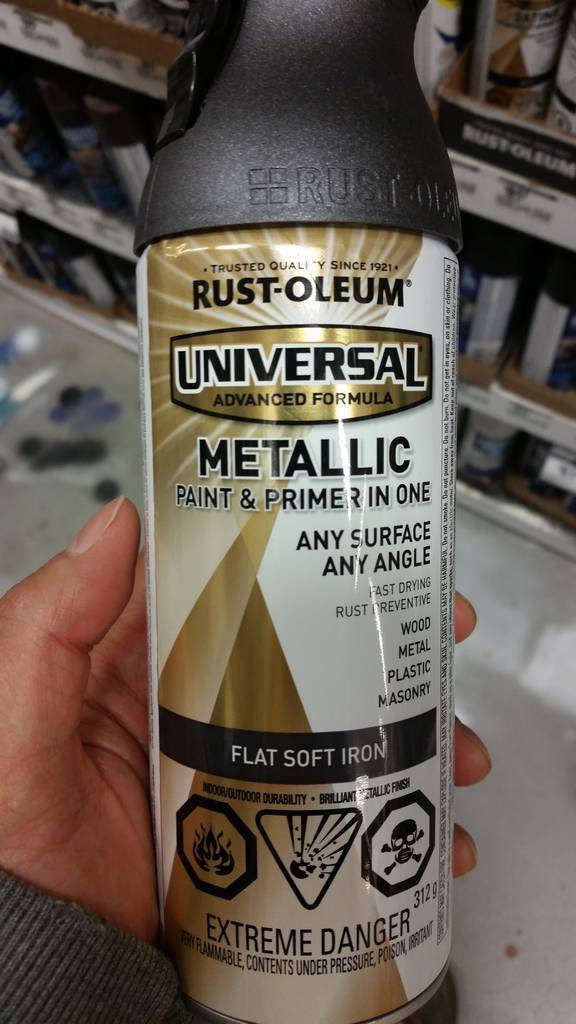
- Rust-Oleum Flat Soft Iron can paint x 8 cans = $70 CAD
- Techniseal paver protector – $50 CAD
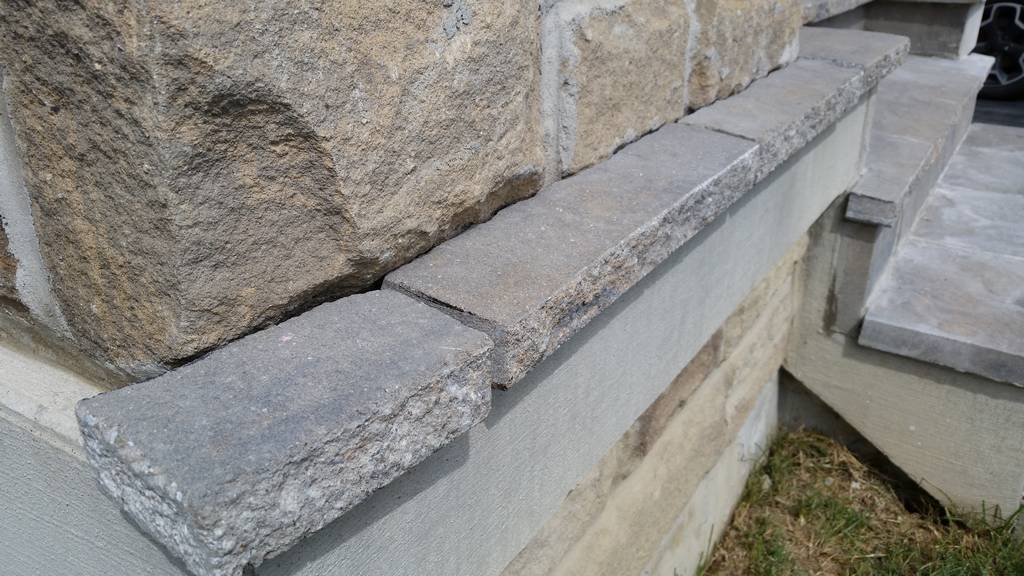
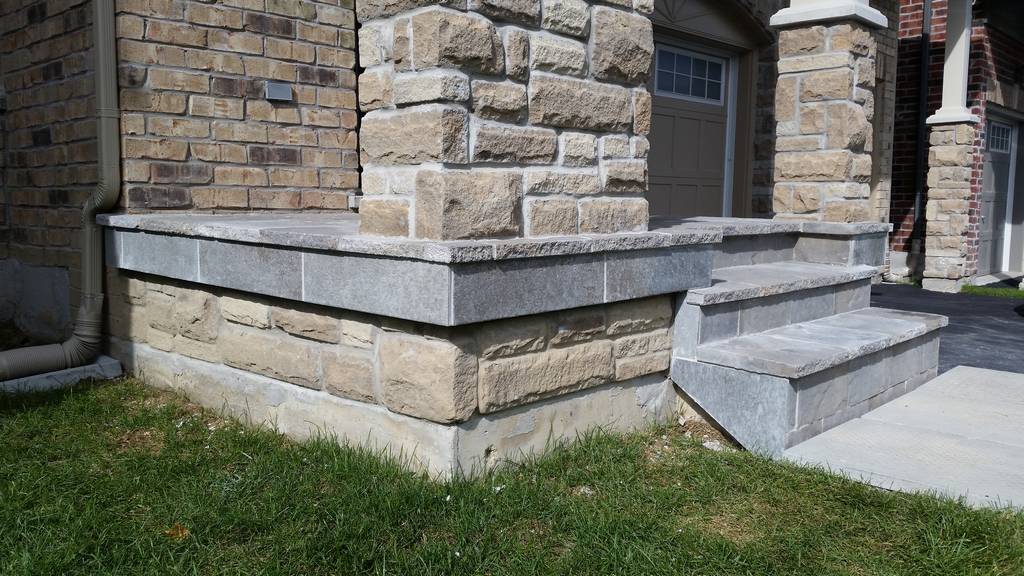
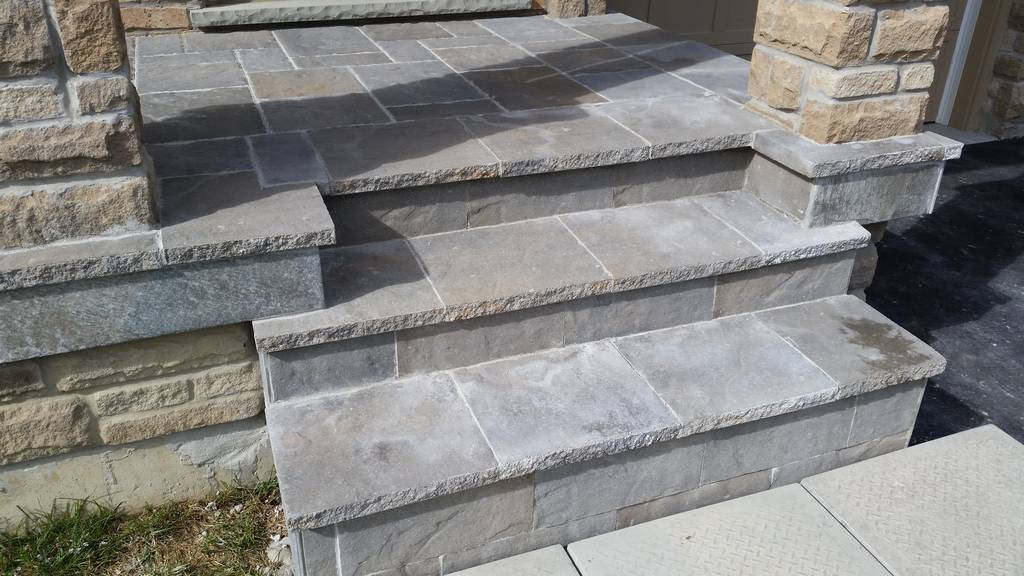
Rain and Harsh winter – No issue at all
We had several heavy rain storm after my installation, and Techniseal did a very good job in repelling the water. Then, harsh winter came with windchill -30C (-22F) and tons of snow as usual, this year I am so glad to find out in spring that everything turns out to be perfect. There is no crack and no water damage at all! Hope this can help other DIY people.
Will I recommend this product?
As I said earlier, professionals do not use these systems on porch, they use natural stones. Google “Natural sandstone steps, caps, coping” and you get the idea. They come with thick one for steps, medium thickness for stairs caps and thin one for surface/wrap. The draw back is that, they come in big slabs regardless of thickness, so you have to cut your own square and rectangle to make them into tiles. In my own opinion, it looks better than Techo Bloc because of the hand-chiseled edges, it adds more character to your porch. Unless you are so into what Techo Bloc calls this as “resemble antique Italian carved stone”, then that’s a different story. For DIY projects, I still recommend Venetian but I hope Techo Bloc may want to add a thinner one such as 1/2″ on 7″ x 16″ to this product line for wrapping around the porch. Even better, they can consider making another line of product to resemble natural stone with hand-chiseled edges.
Hi there,
Been wanting to this exact same project and this post is the best I’ve seen on the matter. Wondering how it held up since then. Also looking at your material list I noticed you had PL glue in there. Wondering when you used glue vs. Mortar and where? Also why the water Shield product? Where should I apply that and is it a must? Would appreciate any input on these 🙂
Today is Sept 2020 and I can tell you this is holding up extremely well. Yes, I used PL Glue for places like caps on the platform and those small pieces around the stone column. You can definitely use mortar for those. That waterproof product is for the tiles, it’s more for isolation membrane to prevent crack. Now, after all these years, there was one maintenance I did . I have posted a video on my YouTube channel, hope that helps: How to fix sinking patio using High Performance Bedding? https://www.youtube.com/watch?v=BhaxH_NYsT4